

How to Apply Ceramic Coating to Wood: Step-by-Step Guide
Ceramic coating goes on a finished, fully cured surface, not on bare wood: degrease the surface with NanoPrep, apply 2–3 coats of Hard Coat 9H+, then after 24 hours 2 coats of Top Coat 9H, and level and buff each coat after a few dozen seconds. The hardest part is timing – each coat stays workable for only 1–5 minutes.
A ceramic nano-layer works like thin glass over oil, lacquer or epoxy: it protects against water, oils, chemicals and white rings from glasses, and it adds depth to the grain. This guide follows the Carbon Method application process and covers everything from preparation and timing the coats to maintenance. You will find all the products in the ceramic wood coatings category.
01What ceramic coating for wood does and where it fits
Ceramic coating is an ultra-thin, very hard layer applied on top of a regular finish – oil, lacquer or epoxy – that increases its resistance and gloss. It does not soak into the wood itself, so it belongs on a finished surface.
The Carbon Method system has two layers with different roles:
| Layer | Role and look |
|---|---|
| Hard Coat 9H+ | base layer ultra-thin and hardest · 2–3 coats · semi-gloss |
| Top Coat 9H | protective top layer thicker, resists water, heat, oils and chemicals · 2 or more coats · high gloss |
The 9H rating refers to the pencil hardness test. The manufacturer states that the layer does not yellow over time, unlike polyurethane finishes and clear epoxy.
- suits dining and coffee tables, worktops, epoxy river tables, furniture in heavy use and outdoor wood, as long as there is an outdoor finish underneath,
- works over all common finishes: hardwax oils, oil-based and water-based finishes, shellac, lacquers, varnishes, spar urethane and epoxy flood coats,
- does not suit bare wood or cutting boards – a knife cuts through the layer and the ceramic coating has no food-contact certification.
02What you will need
The easiest option is a kit that contains both – the ceramic coating and the application tools. One kit with 30 ml of Hard Coat and 30 ml of Top Coat covers roughly 7 m² with two coats of each, or roughly 4.5 m² with three coats of Hard Coat. That is enough for a 2 × 1 m dining table top including the edges.
| Kit | What it contains |
|---|---|
| Large Kit | Ceramic Nanofinish Kit – Large Kit Hard Coat 30 ml · Top Coat 30 ml · Level It 15 ml · applicator block · 10 coating cloths · 4 buffing towels · 4 pairs of gloves |
| Ultimate Kit | Ceramic Nanofinish Kit – Ultimate Kit everything in the Large Kit + NanoPrep preparation spray + Ceramic Care maintenance spray |
A kit or individual bottles?
If this is your first piece, go for the Ultimate Kit – it includes preparation and maintenance for a long time to come. Individual bottles are handy for topping up and for renewing the Top Coat:
 Ultimate Kitpreparation, protection and care · all in one boxView ›
  Large Kitceramic coating + application tools · about 7 m²View ›
  Hard Coat 9H+base layer · semi-gloss · 30 mlView ›
  Top Coat 9Htop layer · high gloss · 30 mlView ›
Also have nitrile or latex gloves ready (they come with the kit), a clean microfiber cloth or compressed air for dust, and a scrap piece finished the same way as your project – use it to practise the process.
03Surface preparation: cured finish, cleanliness and NanoPrep
Ceramic coating only bonds to a clean, dry and fully cured surface. The curing time is set by the maker of your finish – for example, Rubio Monocoat Oil Plus 2C with its accelerator needs 7 days.
- Put on gloves and keep them on until the end – oils from your skin reduce adhesion.
- Prepare the space – well ventilated, free of dust and draughts that would carry dirt onto the surface.
- Remove the dust with a microfiber cloth or compressed air. Do not use this cloth in the later steps.
- Degrease the surface – spray NanoPrep onto a clean, lint-free cloth and wipe the whole surface thoroughly along the grain. Let it dry and repeat.
- Wait until the cleaner has fully evaporated. On a damp surface the ceramic coating goes on unevenly and protects less.
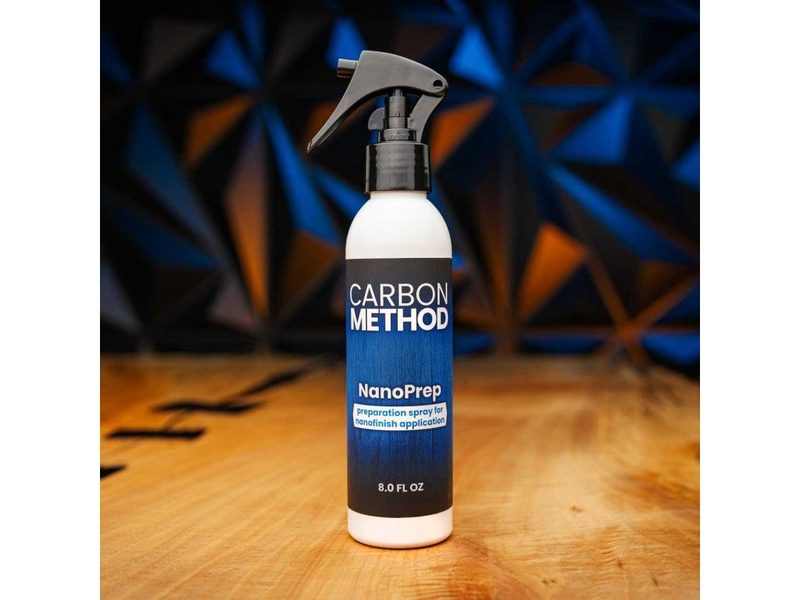
NanoPrep is a preparation spray that removes grease and cleaner residue from the surface and evaporates quickly without a trace. It is part of the Ultimate Kit, and on its own it is also useful before every Top Coat renewal.
- spray onto the cloth, not directly onto the wood,
- wipe along the grain, twice,
- the surface must be dry before the first coat of Hard Coat.
04Applying one coat step by step
Work in sections of up to 0.8 m² (the first time, better around 0.4 m², roughly 60 × 60 cm), because each section gives you only 1–5 minutes, depending on temperature and humidity. Overlap neighbouring sections as little as possible; you blend the transition when buffing.
- Load the applicator – shake the bottle thoroughly and apply the ceramic coating to the centre of the cloth on the applicator block until the cloth is saturated. Shake the bottle again before every refill.
- Lay a well line and outline the section – run the first stroke straight across the grain. This line holds the most ceramic coating. Then outline a rectangle of the working section with the block.
- Spread over the section – draw the block from the well line to the opposite edge until the whole section is covered. No spot may stay dry.
- Turn 90° and alternate strokes crosswise until you feel slight resistance. That is the solvent starting to evaporate and the coat starting to set. Better too much than too little, but do not overwork the surface.
- Level – after 60–90 seconds, lightly drag the bevelled edge of the block across the surface at 45°, without pressure, using only the block's weight. This removes the excess.
- Buff – after another 60–90 seconds, buff with a clean microfiber towel folded into quarters, lightly and in circles. The surface feels tacky at first and gradually turns slick, like after wax. Use a clean quarter of the towel for each buffing.
- Move to the next section with a slight overlap until the whole surface is done.
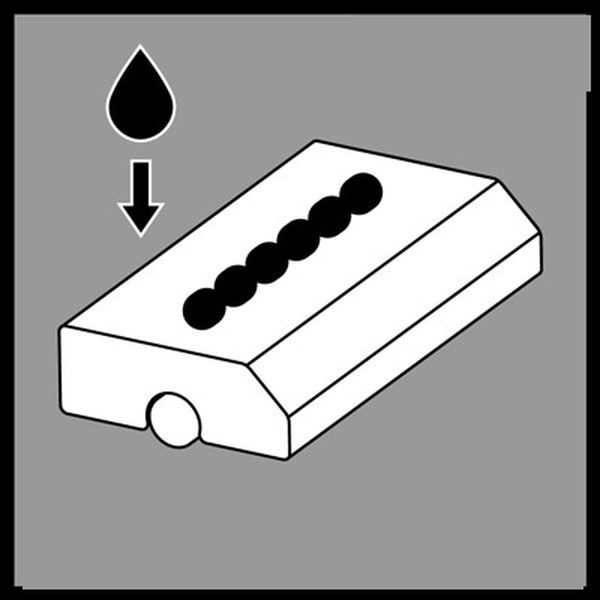


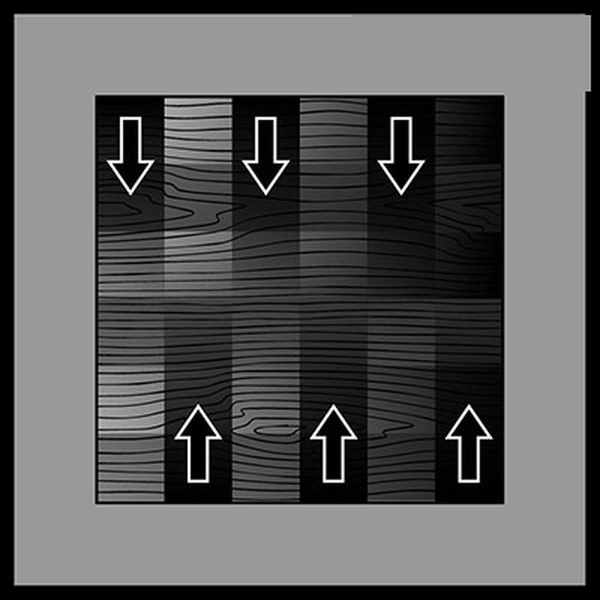

The manufacturer's video shows the whole process:
Application tools that make the job easier
The closed-cell foam block does not soak up the ceramic coating, so you use less of it and always have the levelling edge at hand. Coating cloths and buffing towels are consumables:
 Coating Applicator Blockapplicator block · 45° bevelled edgeView ›
  Coating Clothsapplication cloths · 10 pcs · single useView ›
  Buffing Towelbuffing microfiber · 4 pcs · lint-freeView ›
05More coats, timing and temperature
For full protection, apply 2–3 coats of Hard Coat 60 minutes apart, then after 24 hours 2 coats of Top Coat, again 60 minutes apart. Apply each coat the same way as in chapter 04, always with a fresh coating cloth.
How to fix glossier spots
Once the surface is finished, look at it against the light. Spots that shine more than their surroundings appear on section overlaps, where buffing was insufficient or where the coat went on unevenly. The Level It solution from the kit re-dissolves them within 4 hours of application: spray it onto a clean buffing towel and buff the spot.
Application temperature
| Temperature | What to watch out for |
|---|---|
| below 10 °C | do not apply – the manufacturer recommends at least 10 °C |
| around 10 °C | wait 90 minutes between coats instead of 60 |
| normal room temperature | times as per the guide: 1–5 minutes working time, coats 60 minutes apart |
| above 27 °C | working time gets much shorter – work in smaller sections and buff within 60 seconds |
06Maintaining and renewing ceramic coating
You can clean the finished surface with ordinary cleaning products. To keep the gloss and water repellency, all it takes is Ceramic Care once a week to once a month and a fresh coat of Top Coat once a year (every 4–6 months in a restaurant or on a worktop in heavy use).
- Ceramic Care – spray it onto the surface and spread it thoroughly with a soft cloth.
- Wipe off the rest of the liquid and let it dry.
- Buff – lightly spray Ceramic Care onto a microfiber towel and buff the surface to a streak-free shine. More applications build up the protection.
Over time the surface loses some of its gloss – micro-scratches reflect light differently from the clear ceramic. Renewal is simple: clean the surface with NanoPrep and apply 2–3 coats of Top Coat.
For maintenance and renewal
Both sprays are in the Ultimate Kit. If you started with the Large Kit, add them separately:
 Ceramic Careregular maintenance · restores gloss · 236 mlView › NanoPrepprep before renewal · degreases without a trace · 236 mlView › Top Coat 9Hrenewal once a year · 2–3 coatsView ›
Store all products in their original packaging and protect them from frost. Keep the bottles closed while you work – the ceramic coating sets in the air.
07Common mistakes and how to fix them
Most defects come from moisture, too much pressure or buffing too late. You can fix them either right away with Level It, or after curing by sanding back and applying new coats.
| What you see | Cause · fix |
|---|---|
| glossier spots and patches on overlaps | coat applied unevenly or not buffed enough Level It within 4 hours; after curing see the last row |
| fine scratches after application | reused coating cloth or too much pressure a fresh cloth for every coat, guide the block without pressing |
| uneven, blotchy look | the cleaner had not evaporated or the surface was damp wait until the surface is completely dry before applying |
| streaks after buffing | buffing too hard or with a dirty part of the towel light circular motion, always a clean quarter of the towel |
| the coat cannot be buffed out | buffing too late, especially in the heat smaller sections, buff within 60–90 seconds |
| defects after curing | sand back with a fine abrasive pad on a random orbital sander the defects first, then the whole surface – without cutting through the finish; then start again from Hard Coat |
If sanding back does not help, the ceramic coating has to be removed completely, the finish renewed and the process started again.
- it goes on a cured oil, lacquer or epoxy, not on bare wood or cutting boards,
- preparation: gloves, dust off, NanoPrep twice, the surface must be dry,
- one section up to 0.8 m²: load, well line, cross strokes, level after 60–90 s, buff after another 60–90 s,
- 2–3× Hard Coat 60 min apart → 24 h → 2× Top Coat 60 min apart → 24 h without liquids,
- maintain with Ceramic Care, renew Top Coat once a year, always use fresh coating cloths.
Protect your table with ceramic coating
Carbon Method kits and individual layers, preparation and maintenance – in stock.
Browse ceramic coatingsRelated products and categories
- Kits: Ceramic Nanofinish Ultimate Kit, Ceramic Nanofinish Large Kit
- Layers: Hard Coat 9H+, Top Coat 9H · Preparation and care: NanoPrep, Ceramic Care
- Tools: Coating Applicator Block, Coating Cloths, buffing towels
- Base finish: wood finishes – oils, waxes and lacquers to go under the ceramic coating
Related guides
- Carbon Method product overview
- How to make an epoxy resin table – ceramic coating as the final layer of a river table
- How to care for a cutting board with oil and wax – where not to use ceramic coating
Frequently asked questions about ceramic coating for wood
Can I apply ceramic coating to bare wood?
No. Ceramic coating belongs on wood that already has a finish – oil, lacquer or epoxy. Let that finish cure fully according to its manufacturer's instructions first, for example 7 days for Rubio Monocoat Oil Plus 2C with its accelerator.
Which finishes does ceramic coating work over?
According to the manufacturer, all common ones: hardwax oils, oil-based and water-based finishes, shellac, lacquers, varnishes, spar urethane and epoxy flood coats. The base must be cured, clean and degreased with NanoPrep.
Is ceramic coating food safe?
Carbon Method ceramic coating has no food-contact certification. It is used on tables and worktops, but not on cutting boards – a knife cuts through the layer. Treat cutting boards with an oil and wax intended for food contact.
How many coats of ceramic coating should I apply?
For full protection, 2–3 coats of Hard Coat 60 minutes apart and, after 24 hours, 2 coats of Top Coat, again 60 minutes apart. Extra coats of Top Coat increase the gloss.
Does ceramic coating turn yellow over time?
According to the manufacturer, no – unlike polyurethane finishes and clear epoxy, the ceramic layer does not yellow over time.
Can ceramic coating be used outdoors?
Yes, as long as there is a finish intended for outdoor use underneath. The ceramic coating then protects that finish from water and dirt.
How often should ceramic coating be renewed?
Once a year at home, and every 4–6 months in restaurants and on worktops in heavy use. Clean the surface with NanoPrep and apply 2–3 coats of Top Coat. In between, Ceramic Care once a week to once a month is enough.